WORKFLOW
1. Register
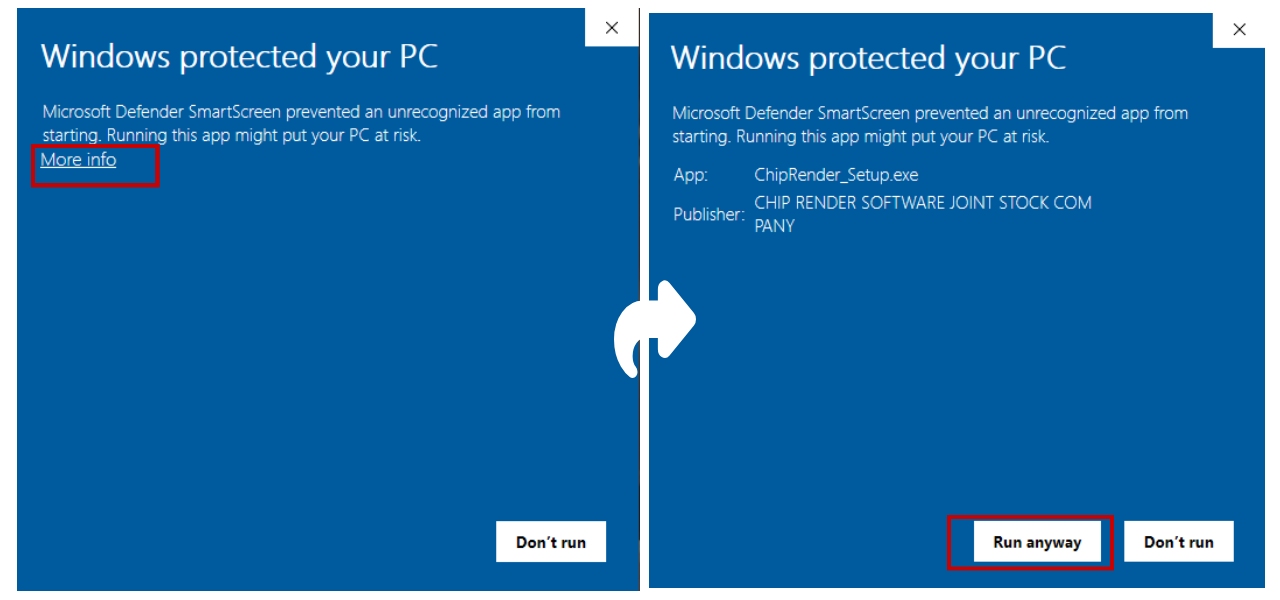
Download and install
You can easily download our Chip Render application Here. Set it up on your computer.
Create an account
Step 1: After installing the Chip Render, open the Chip Render App and Follow the instructions below to fill in the registration.
- Username: choose a username 03-20 characters long. Usernames can contain letters (a-z) and numbers (0-9).
- Email address: enter your correct email address and Chip Render will send a verification message.
- Phone: enter your mobile phone number for better support.
- Country: select your country to identify the nearest server location.
- Password: 6-50 characters, valid values for passwords include at least one lowercase, one uppercase, one numeric, one special character (!, @, #, $, %, ^, &, *), and not contain spaces.
- Re-type password again.
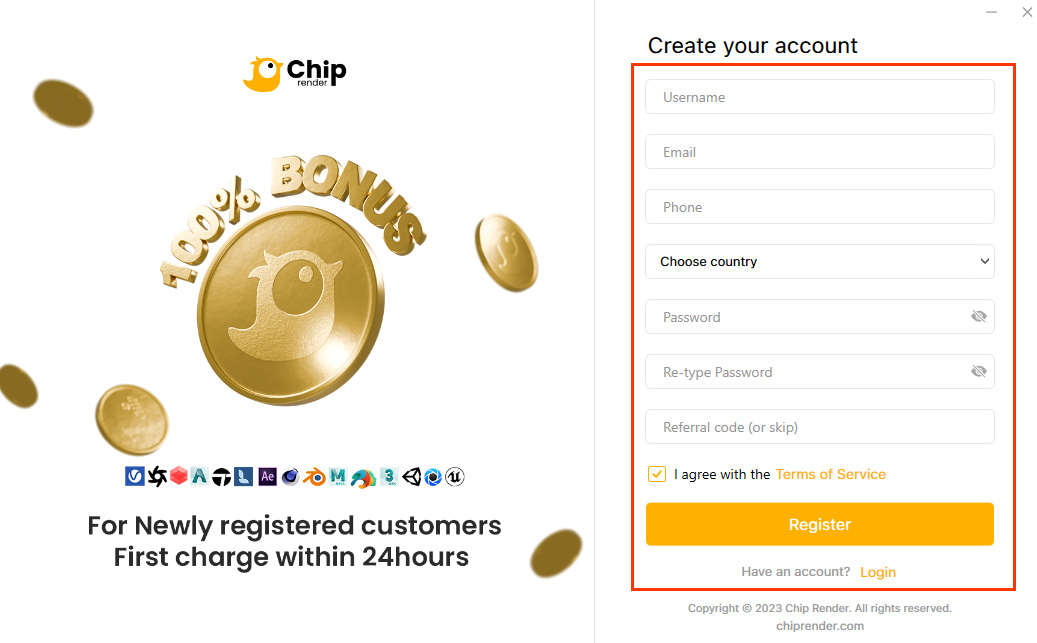
- Choose the checkbox “I agree with the Terms of Service” to confirm.
- Choose REGISTER.
Step 2: Verify your account through the link that Chip Render sends to your email address.
Login
Open Chip Render App » Enter your Chip Render credentials » choose LOGIN.
2. Making Payments
Chip Render allows you to make payments through several payment methods including OnePay, Paypal, Bank Transfer. In addition, for customers in Vietnam, we also accept Momo payment gateway. The minimum amount of money for each transaction is $50.
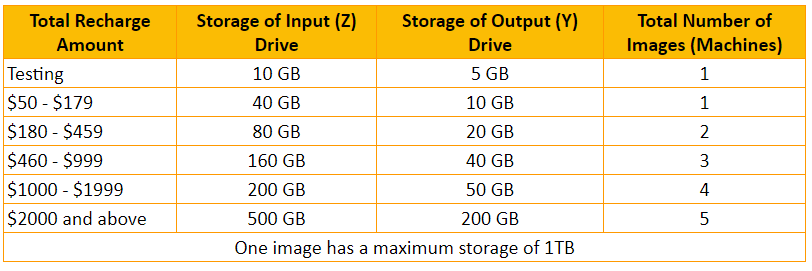
The table below shows the number of system machines and the data storage capacity you have based on your accumulated recharge.
To make payments
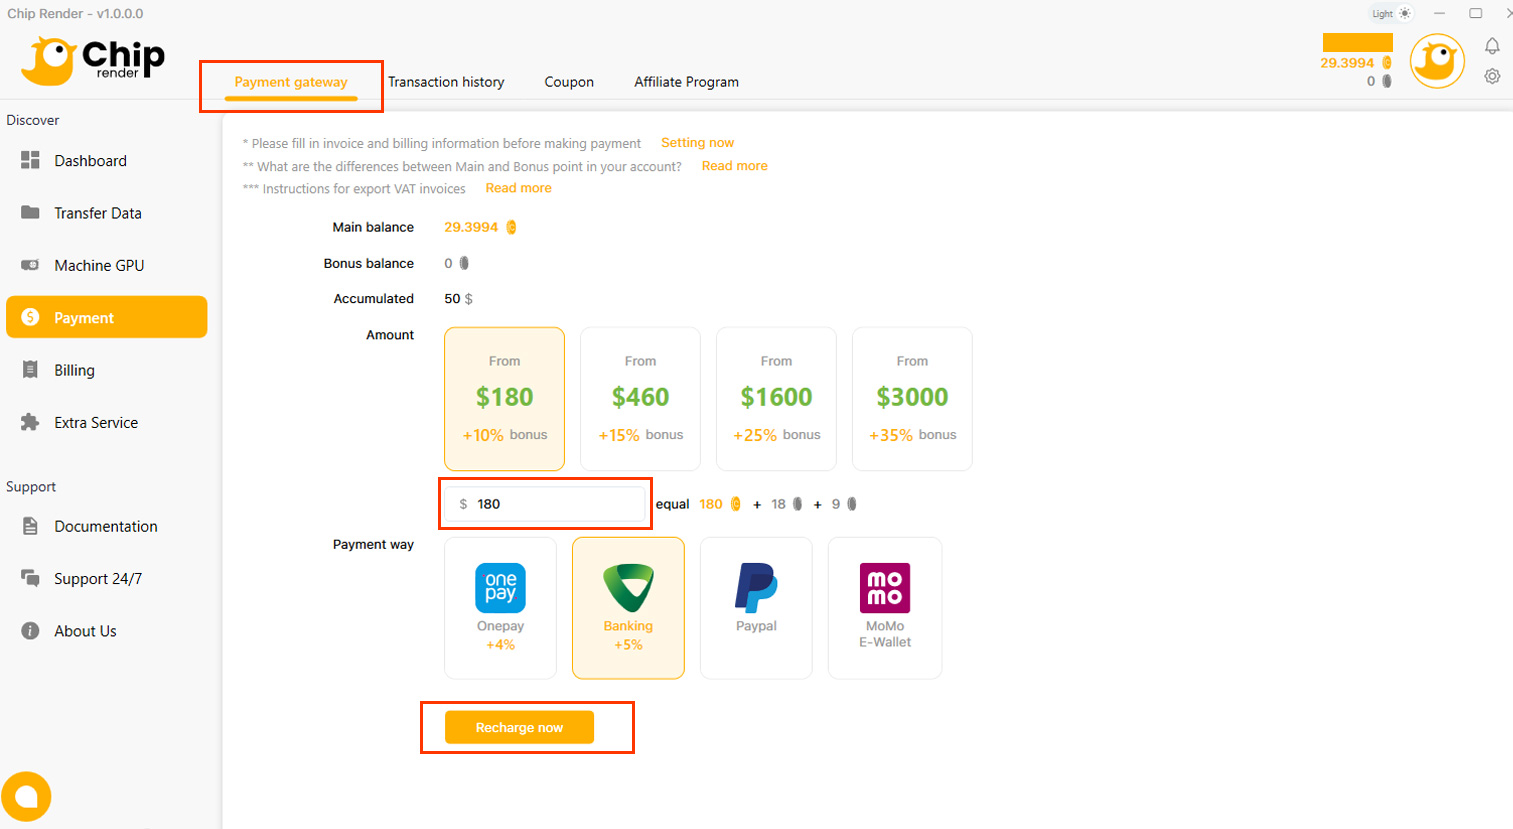
Step 1. Open Chip Render App, choose Payment » select Payment Gateway.
Step 2. On the Payment Gateway page, you can follow top-up through E-wallet including OnePay, Momo, PayPal, and Bank transfer.
E-wallet
- On the Payment Gateway page, enter the amount of money to pay.
- In Payment Way section, choose the E-wallet that you want (OnePay/Momo/PayPal) » select Recharge Now to make payment.
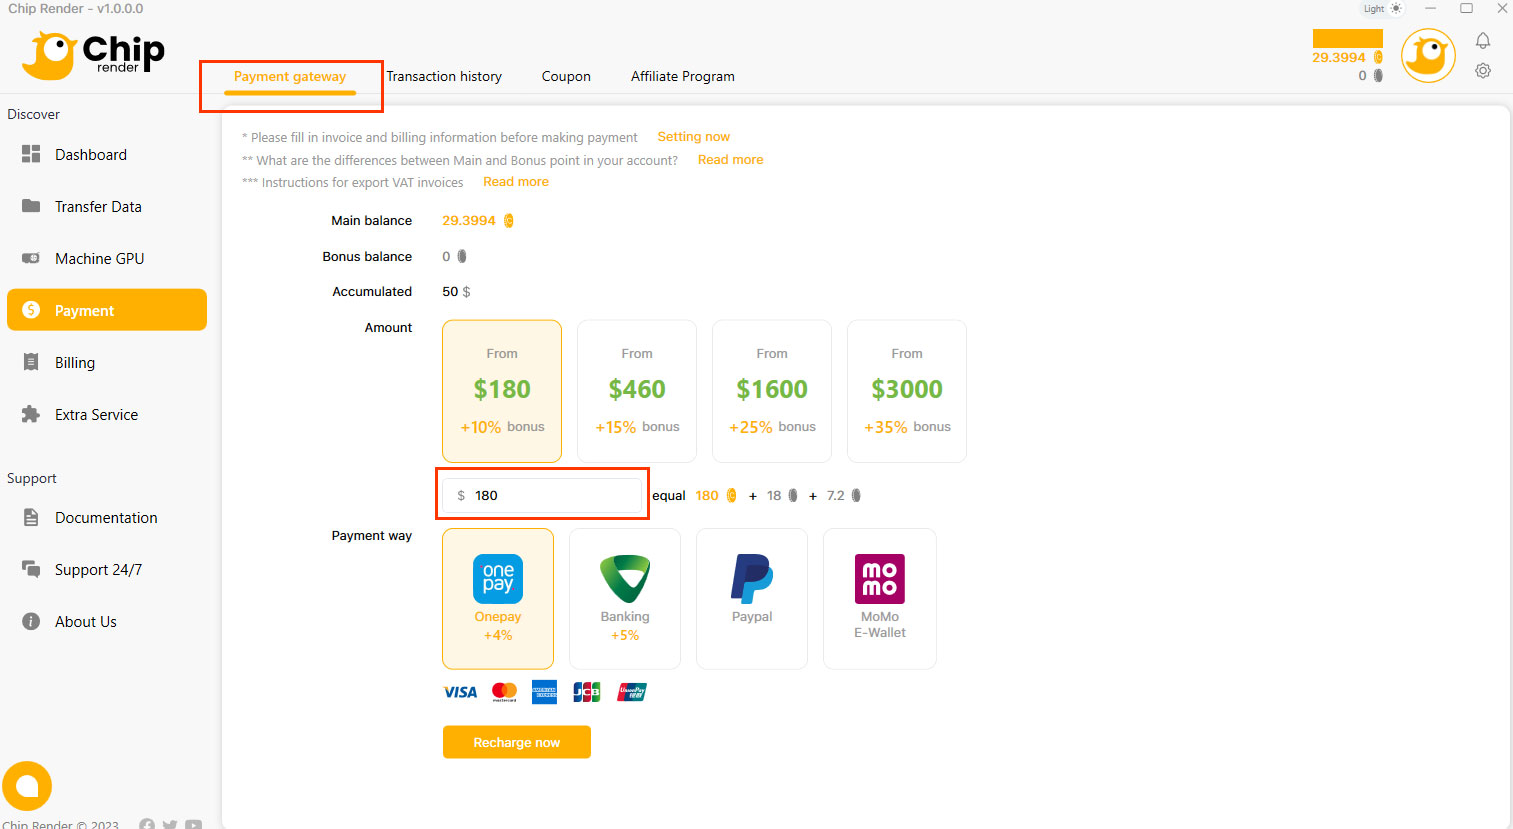
– OnePay supports Visa, MasterCard, American Express, JCB, and UnionPay cards.
– Momo Only for Vietnamese.
– PayPal support visa, Master, American express.
Bank transfer
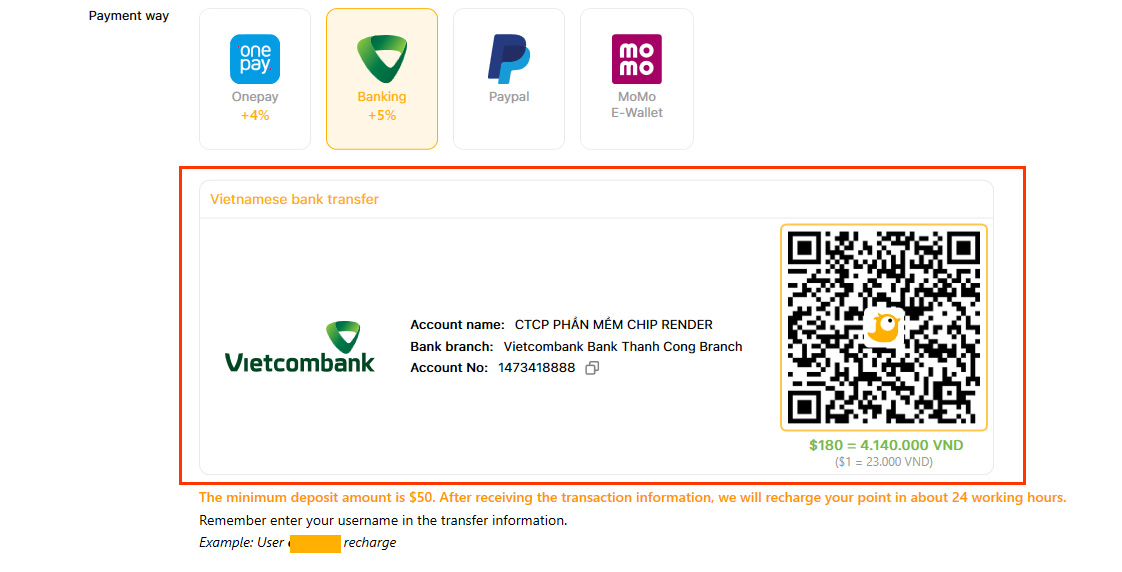
In case of making payments by Bank Transfer: In Payment Way section, choose the Banking icon » select Recharge Now.
In the information Banking box, scan the Payment QR-code via the Banking app or follow the information below to make the payment.
Beneficiary Name: CHIP RENDER SOFTWARE JOINT STOCK COMPANY
Beneficiary Address: No. 06 Central Area of Department X16 Ministry of Public Security, Group 83, Khuong Trung Ward, Thanh Xuan District, Hanoi City, Vietnam
Account Name: CTCP PHAN MEM CHIP RENDER
Account No: 1473418888
Bank Name: Vietcombank Thanh Cong Branch
Bank Address: [/]
Swift code: [/]
After making payments successfully, screenshot the transaction information and send it to us via live chat or email address [email protected].
Information: In case you need to change your Invoice & Billing information, you should correct your Invoice & Billing information before depositing.
3. Transfer files
Upload data projects to Chip Render server
To save time and money, transfer your project files from your computer to our remote server before starting the server.
We have provided an input drive for you to transfer your data to our server, it is called INPUT (Z:). Please upload your data projects to INPUT (Z:), and it will be automatically synced to the Z drive of the Chip Render machine.
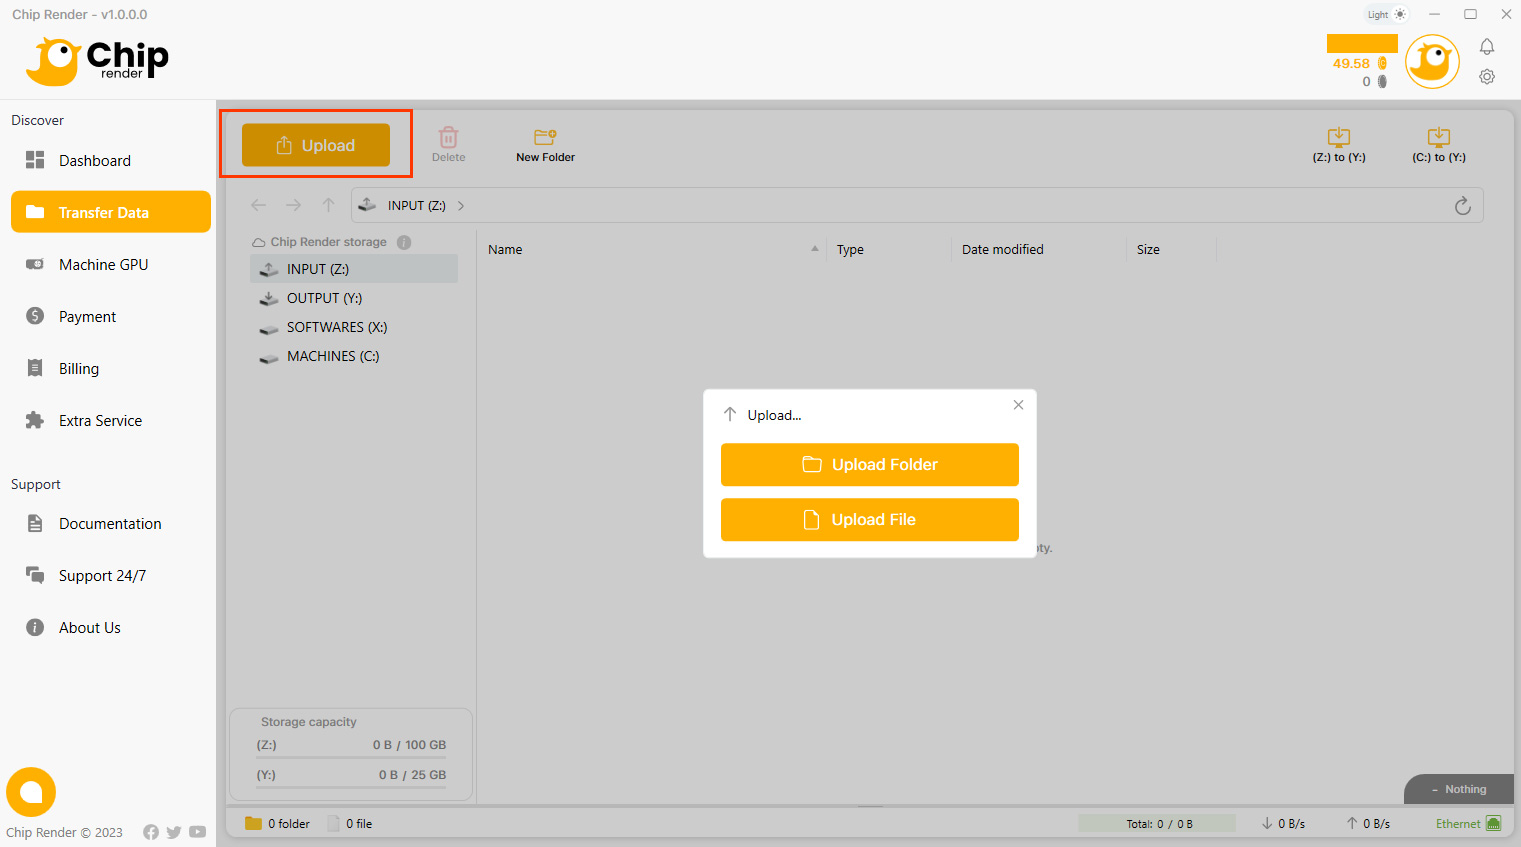
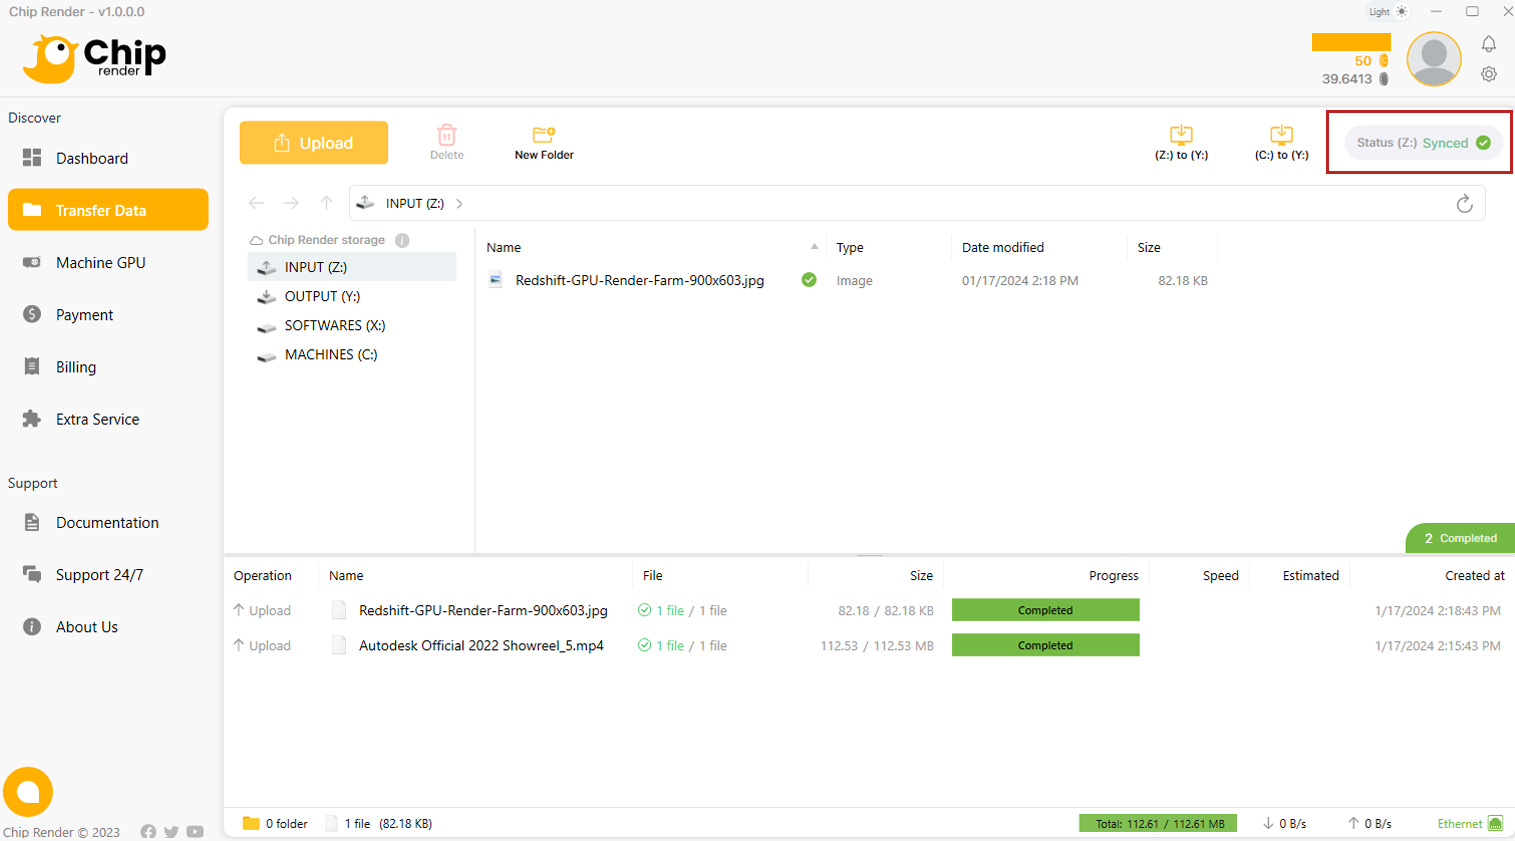
Step 1. Go to the Transfer Data tab.
Step 2. Select INPUT (Z:) » Upload your files (project files, assets, texture, etc) necessary for the render and software installer (if any) by choosing Upload.
Select Upload: You can choose Upload Folder or Upload File (Or drag and drop data to the Transfer data screen to upload).
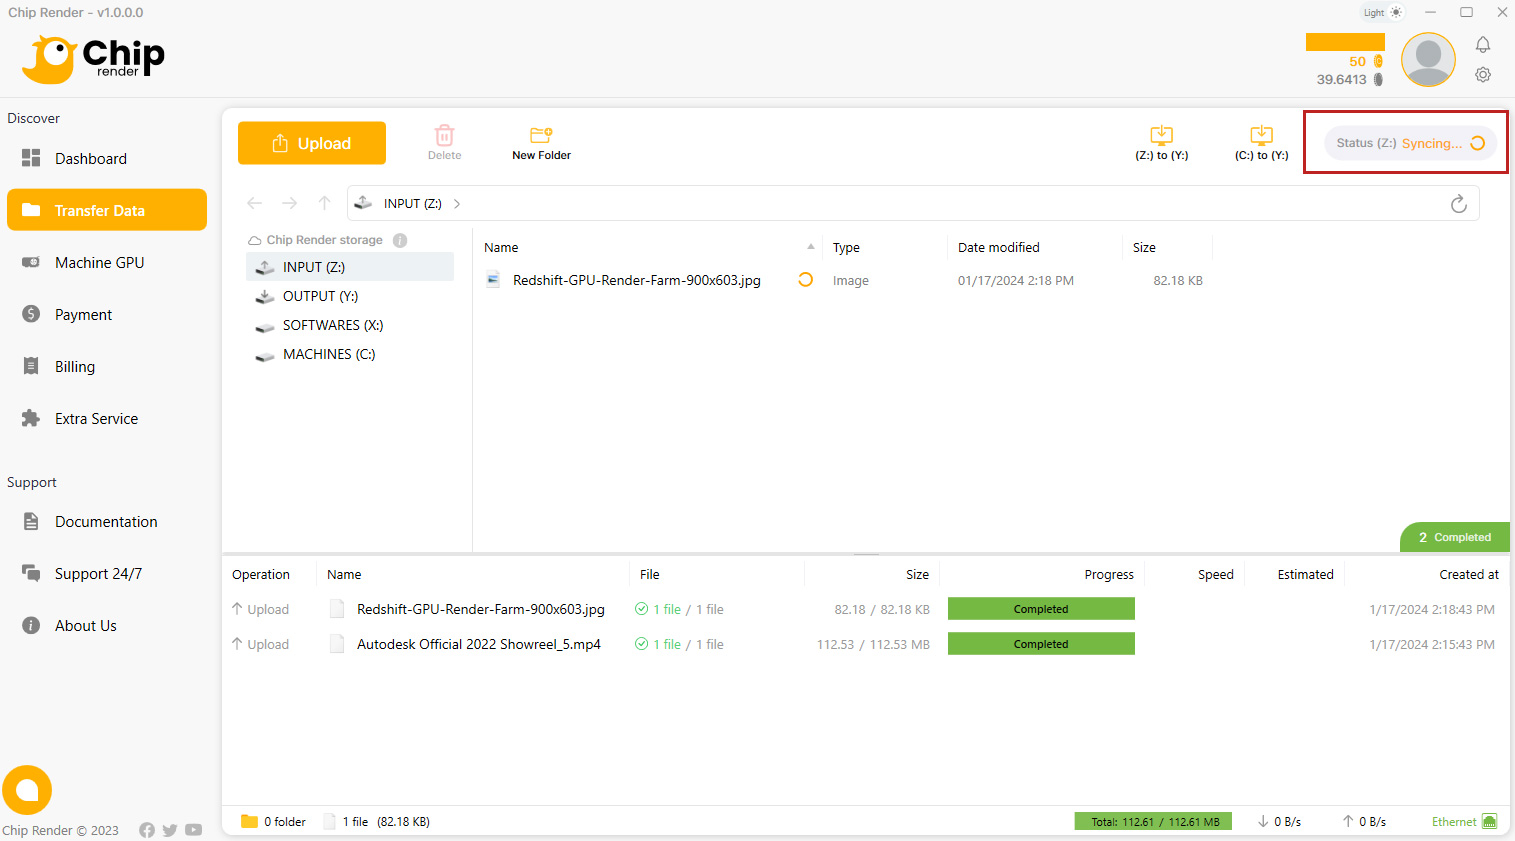
Step 3. Wait for the uploaded data to sync to the Z drive
- Syncing shows that the folder is being synced to Z drive.
- Synced means the sync process is done. Your data has been synced to the Chip Render server.
Download files after rendering as described in the Get results step
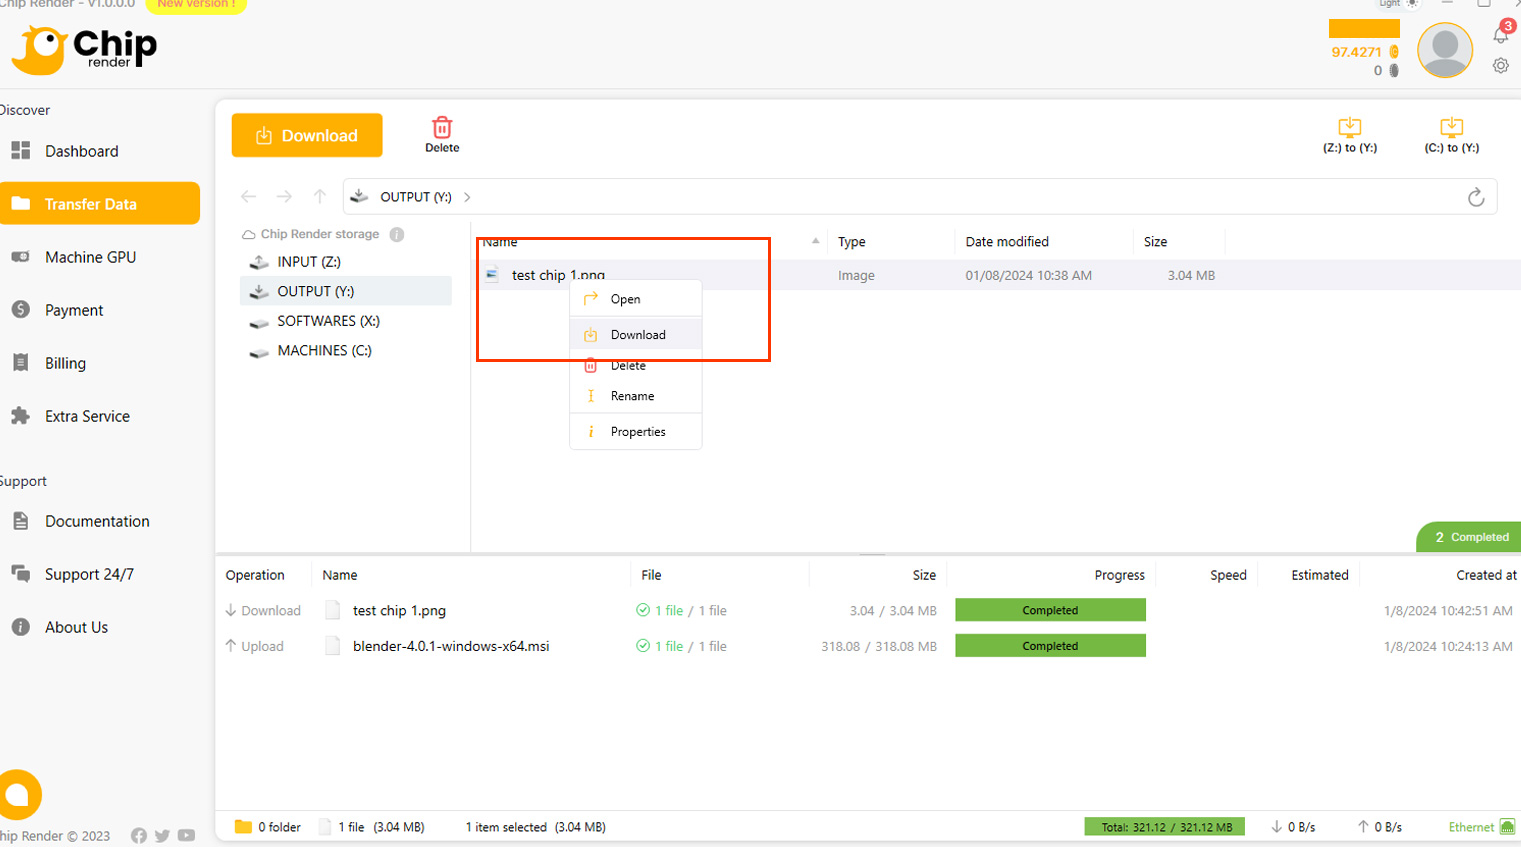
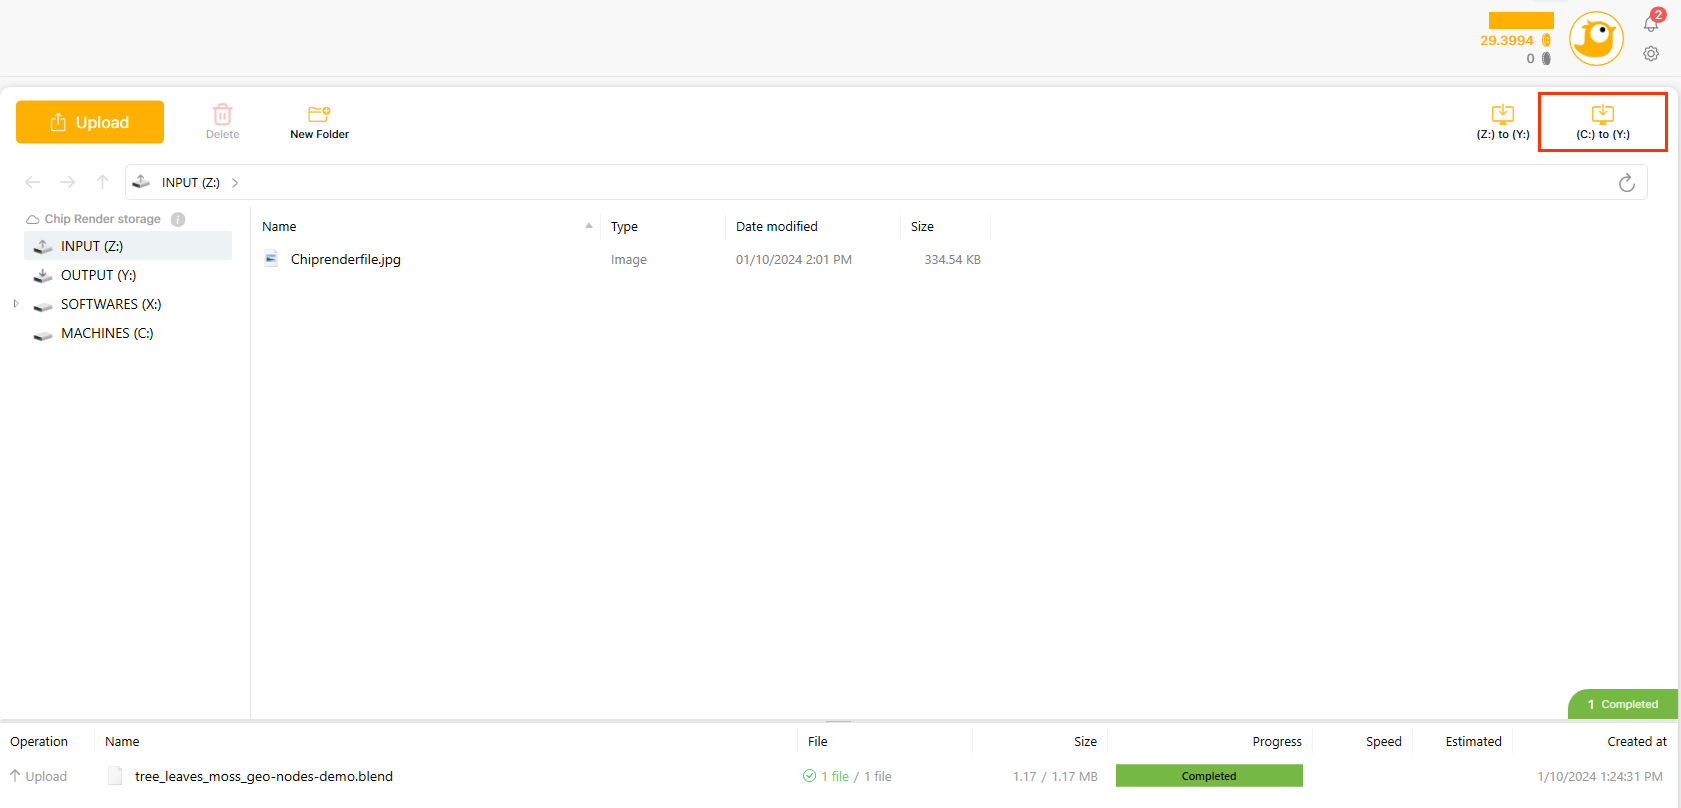
- Move your output files from C: drive to OUTPUT (Y:) drive in Chip render machine. You can download the results file in OUTPUT (Y:) drive on the Transfer Data tab.
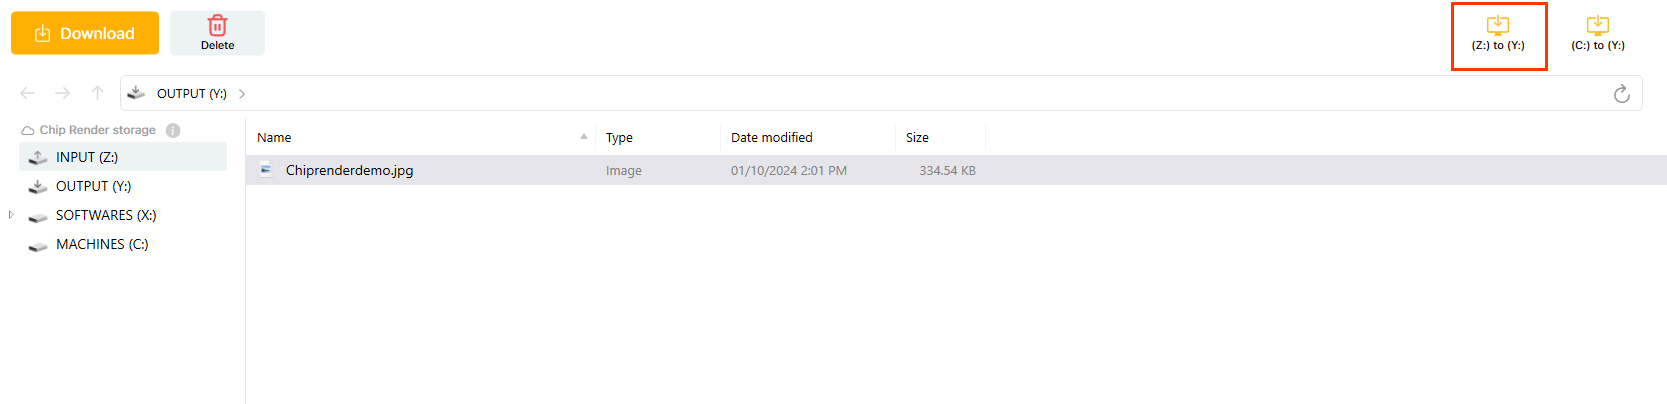
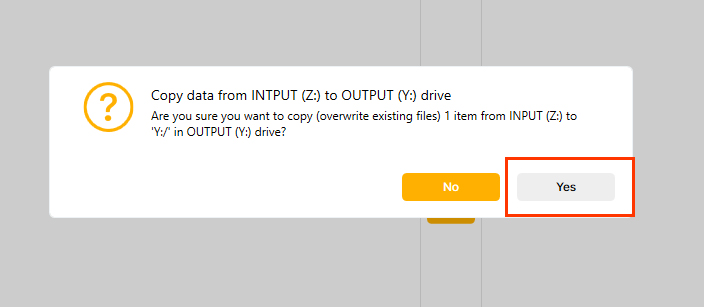
- In case you copy the output file by mistake to the INPUT (Z:) drive. Please use the (Z:) to (Y:) feature in Transfer Data tab to move your output files from the INPUT (Z:) drive to the OUTPUT (Y:) drive:
Go to (Z:) to (Y:), click on it.
Select the file/folder to move to drive Y » Click the arrow icon to switch to (Y:).
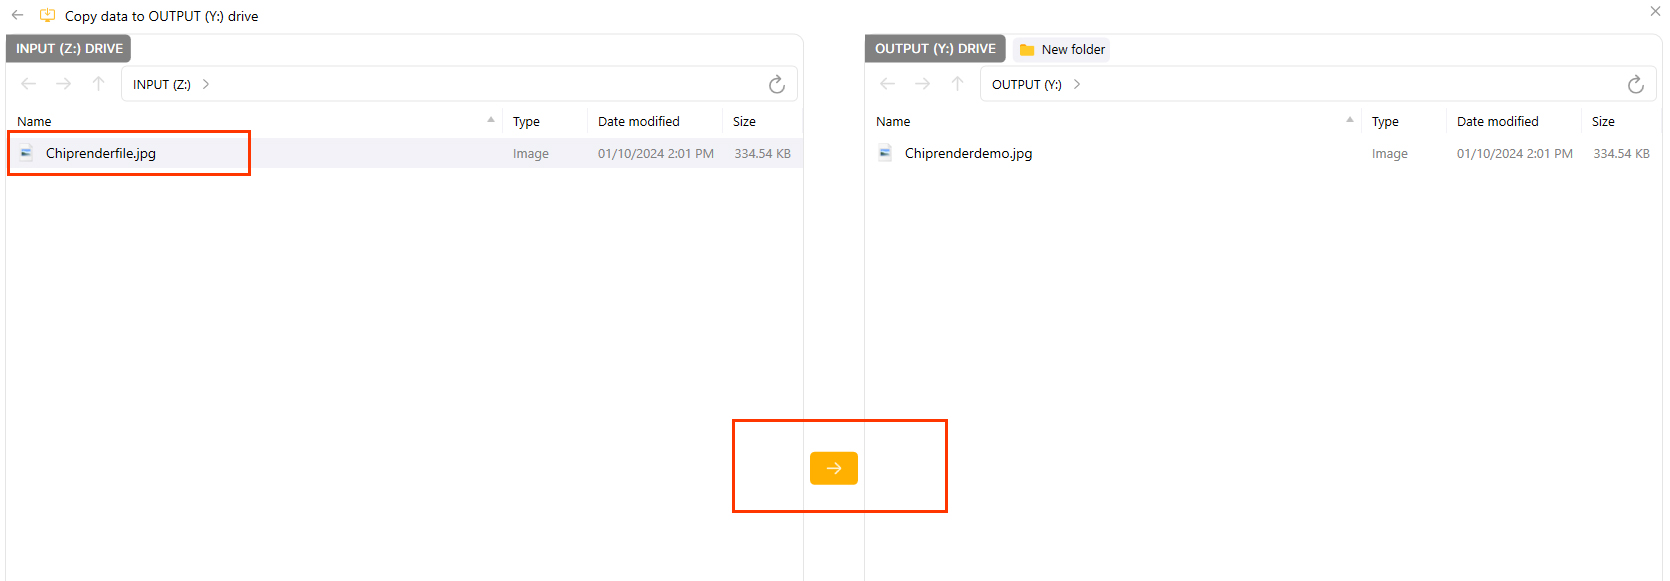
After copying the data, please wait for our system to sync to the cloud, then you can download data from Chip Render Cloud to your personal computer.
- In case you have not yet copied the output files to the OUTPUT (Y:) drive in the Chip Render machine, your data is still in Chip Render machine. You can move your output files from the IMAGES (C:) to the OUTPUT (Y:) drive without booting the machine.
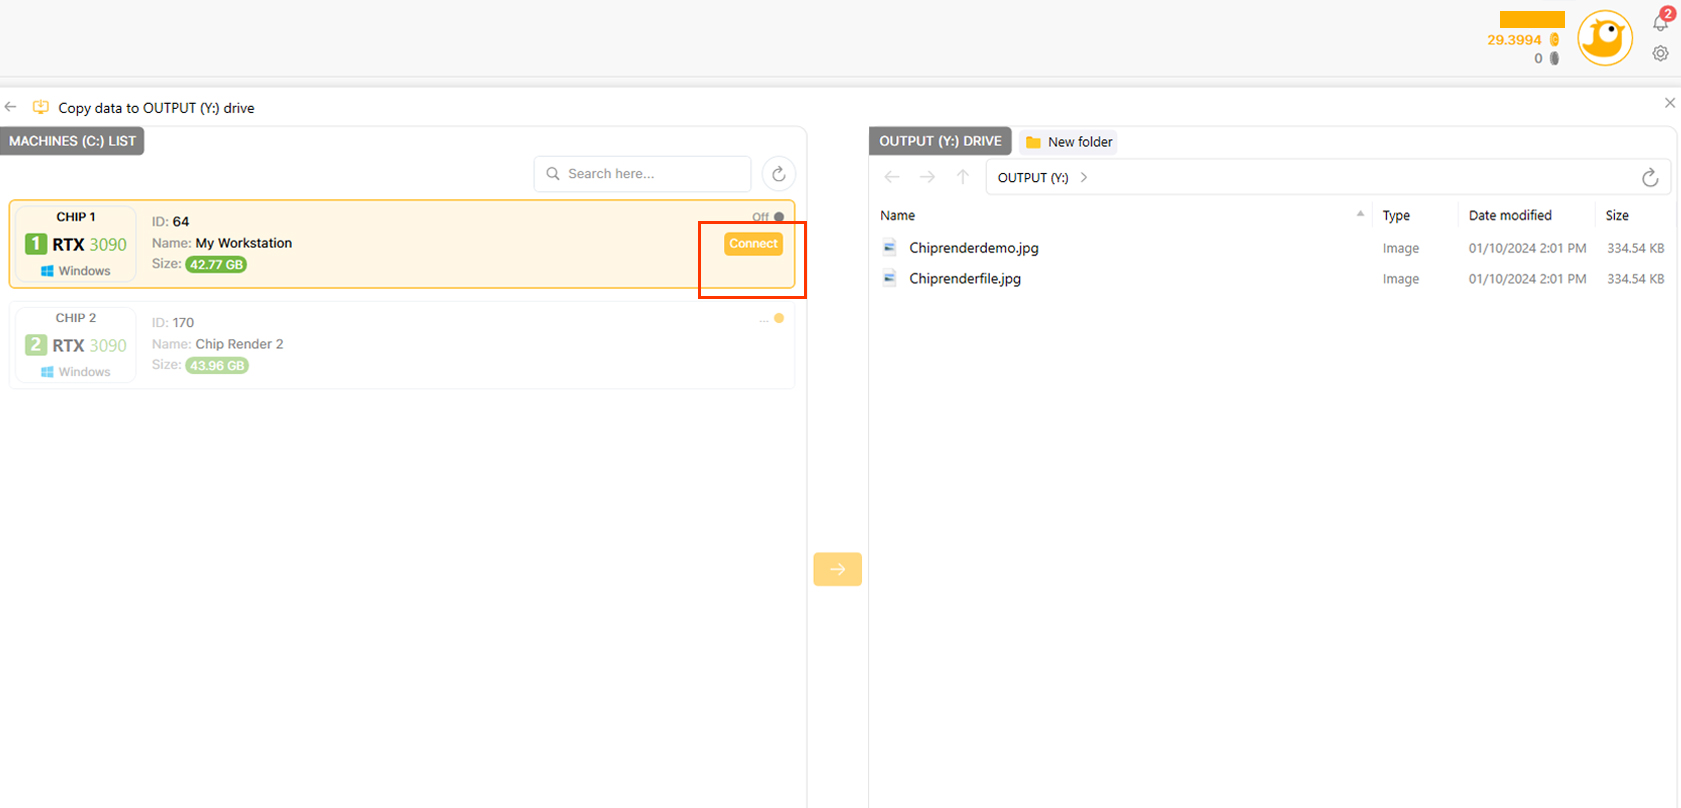
– Click (C:) to (Y:) or MACHINES (C:).
– A list of the user’s machines appears. Select the machine where you need to transfer data to drive Y » click Connect
– Go to the data storage location » select the file/folder to move to drive Y » Click the arrow icon to switch to (Y:).
Task view: Show job status
– Uploading/Downloading: the file/folder is uploading to the app or downloading file/folder from app to your local machine. In this state, you can Stop/Cancel and Resume/Retry the Job by Right-clicking on the uploading/ downloading job.
– Completed: Job status has been successfully uploaded/downloaded.
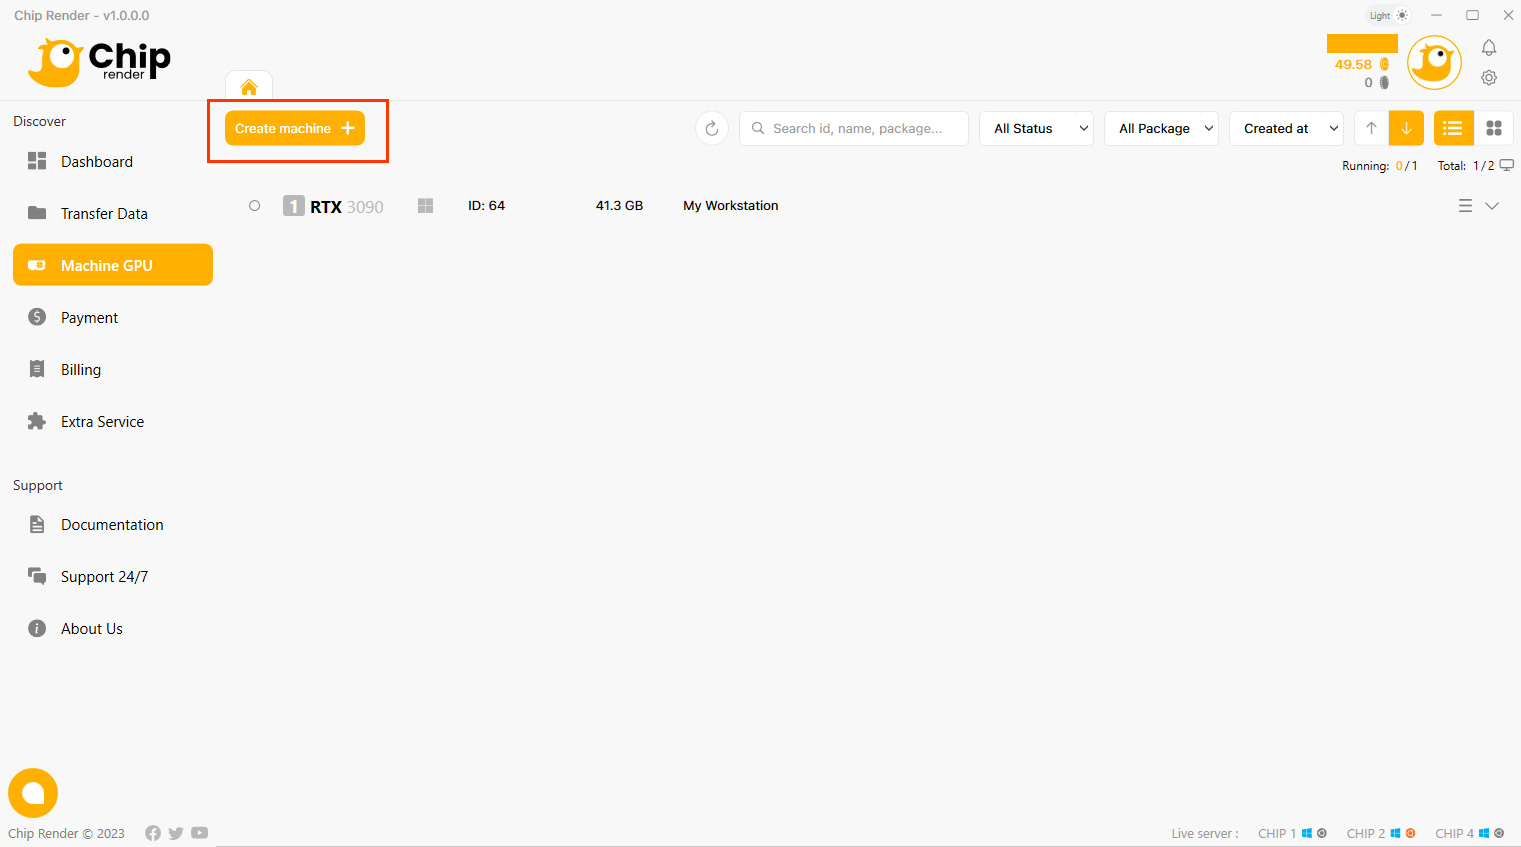
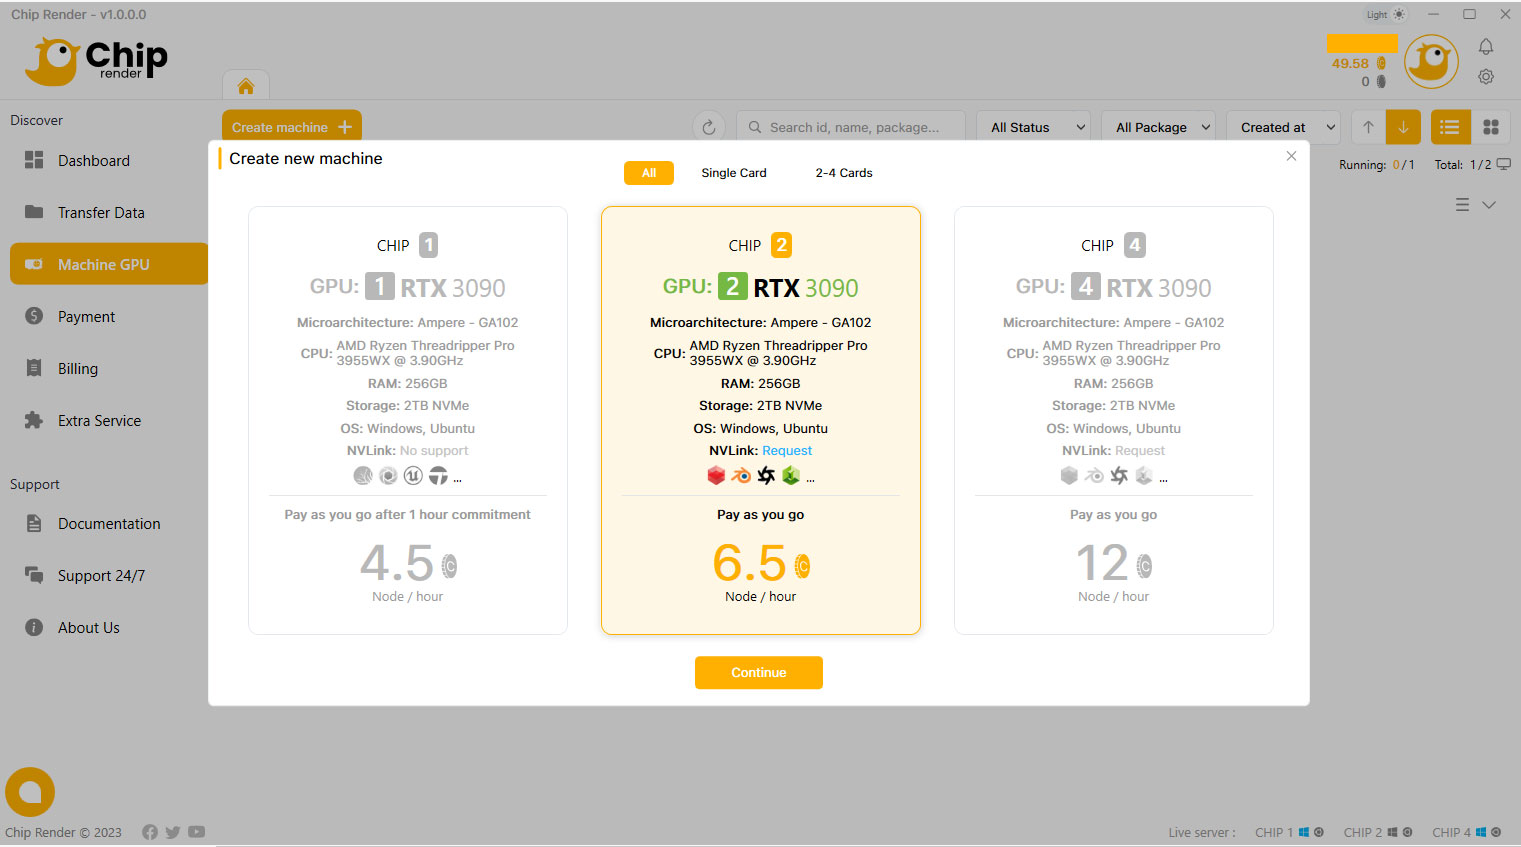
4. Create machine
The machine in the Machine GPU section stores your working environment (installed software and saved data) in our cloud system. Chip Render provides single to multiple GPU servers. Depending on your demand regarding the purpose of 3D rendering or AI training, the use of software & plugins, and the project scale, you should choose the suitable server package.
1. Now, go to Machine GPU section > Create machine.
2. Select a configuration package you want to use and click the Continue button.
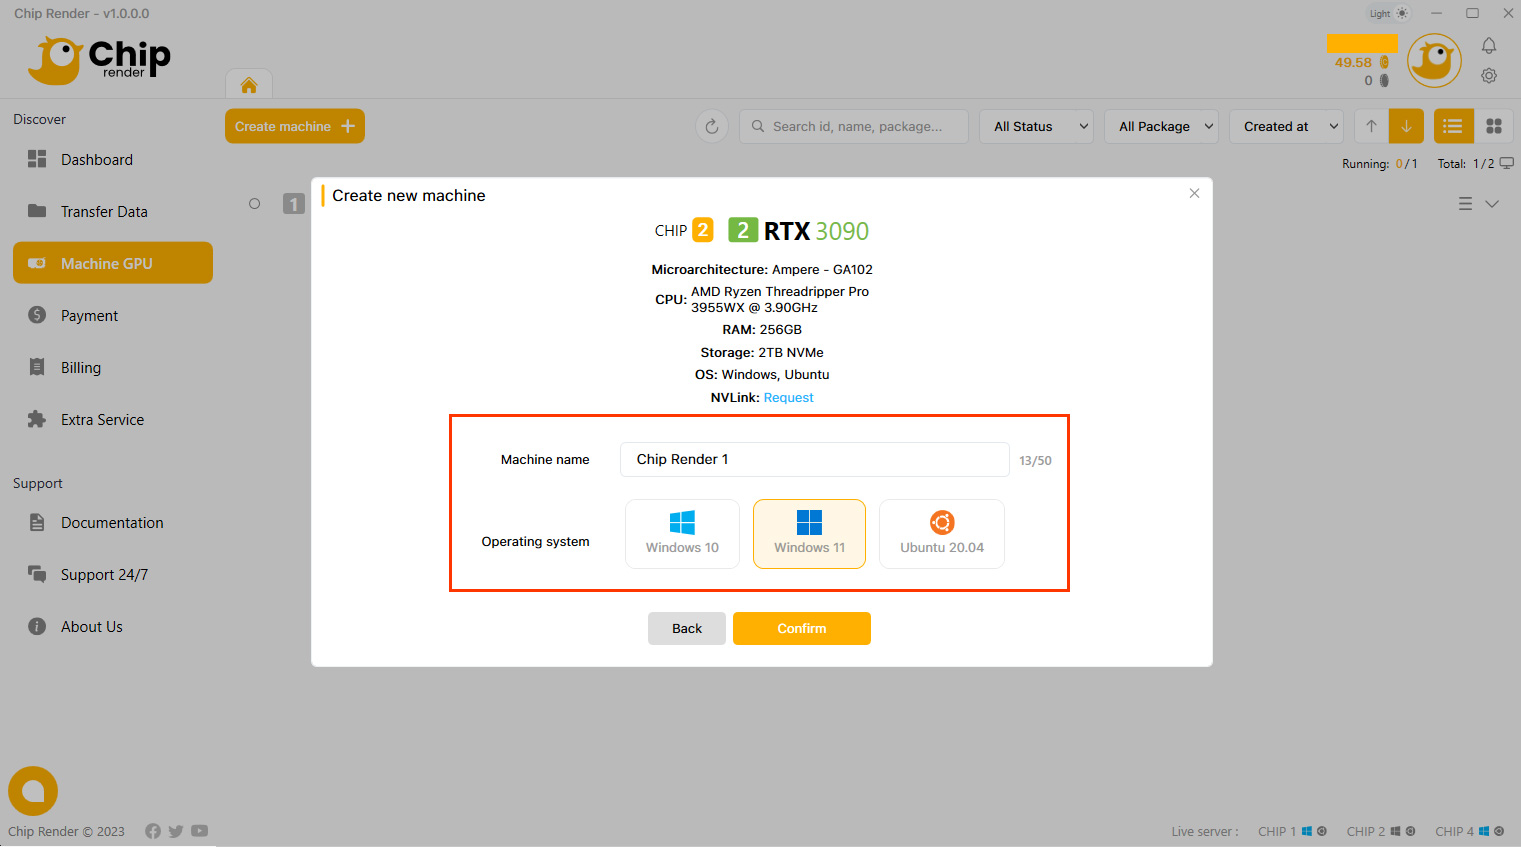
3. Name your machine, choose the OS type and click the Confirm button.
5. Boot a machine
After creating a new machine, click “Boot” > “Boot Machine” and wait a few minutes.
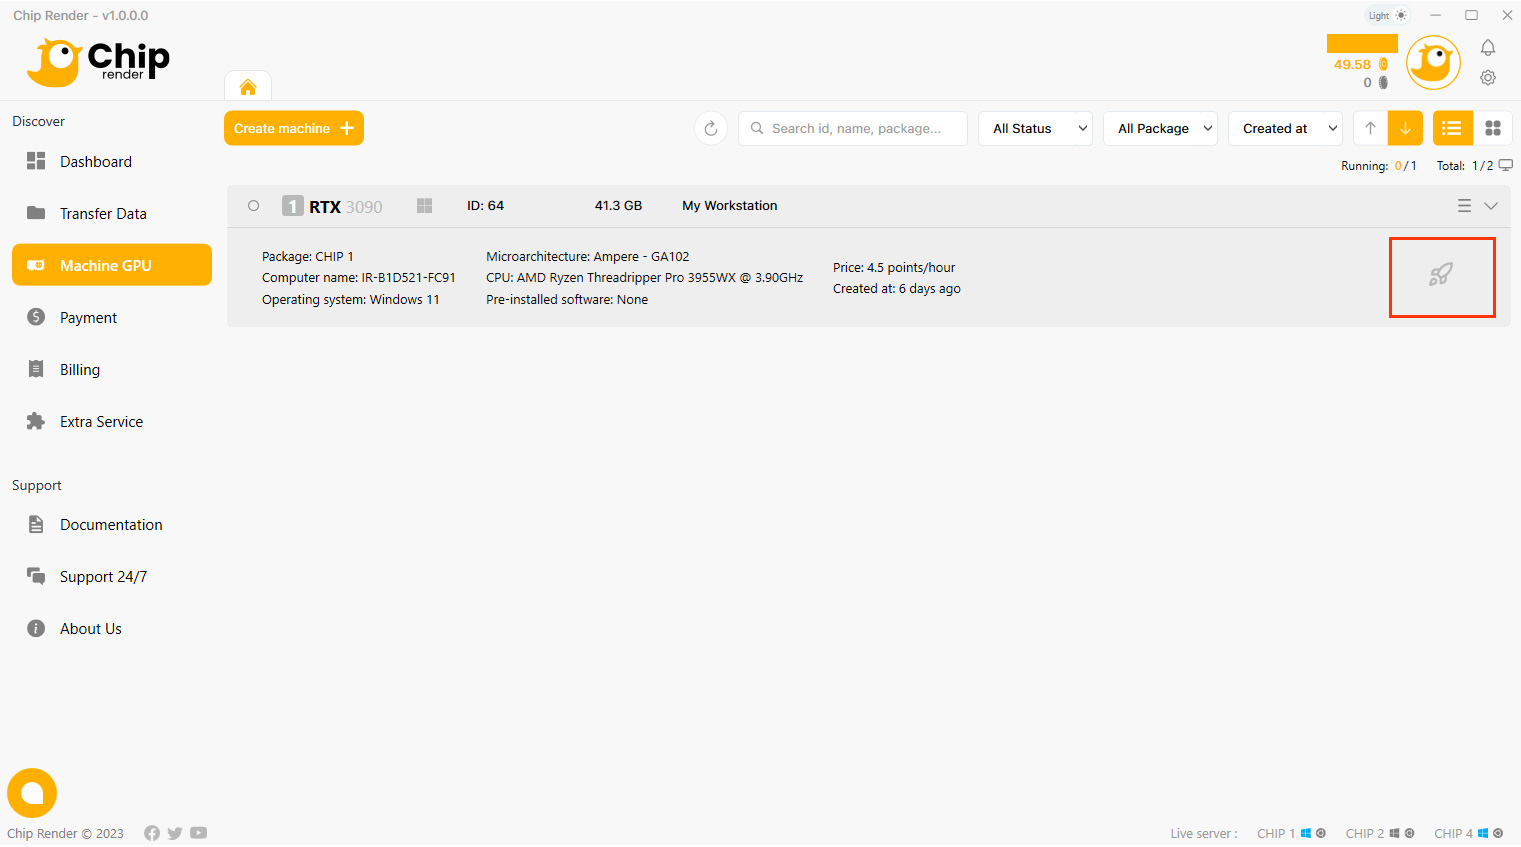
Typically, it takes around 10-15 minutes to boot a machine. The time it takes to boot is dependent on the size of the machine, which includes everything you have on your server such as installed software, saved data, and so on. The more data you have on the machine, the longer it will take to start.
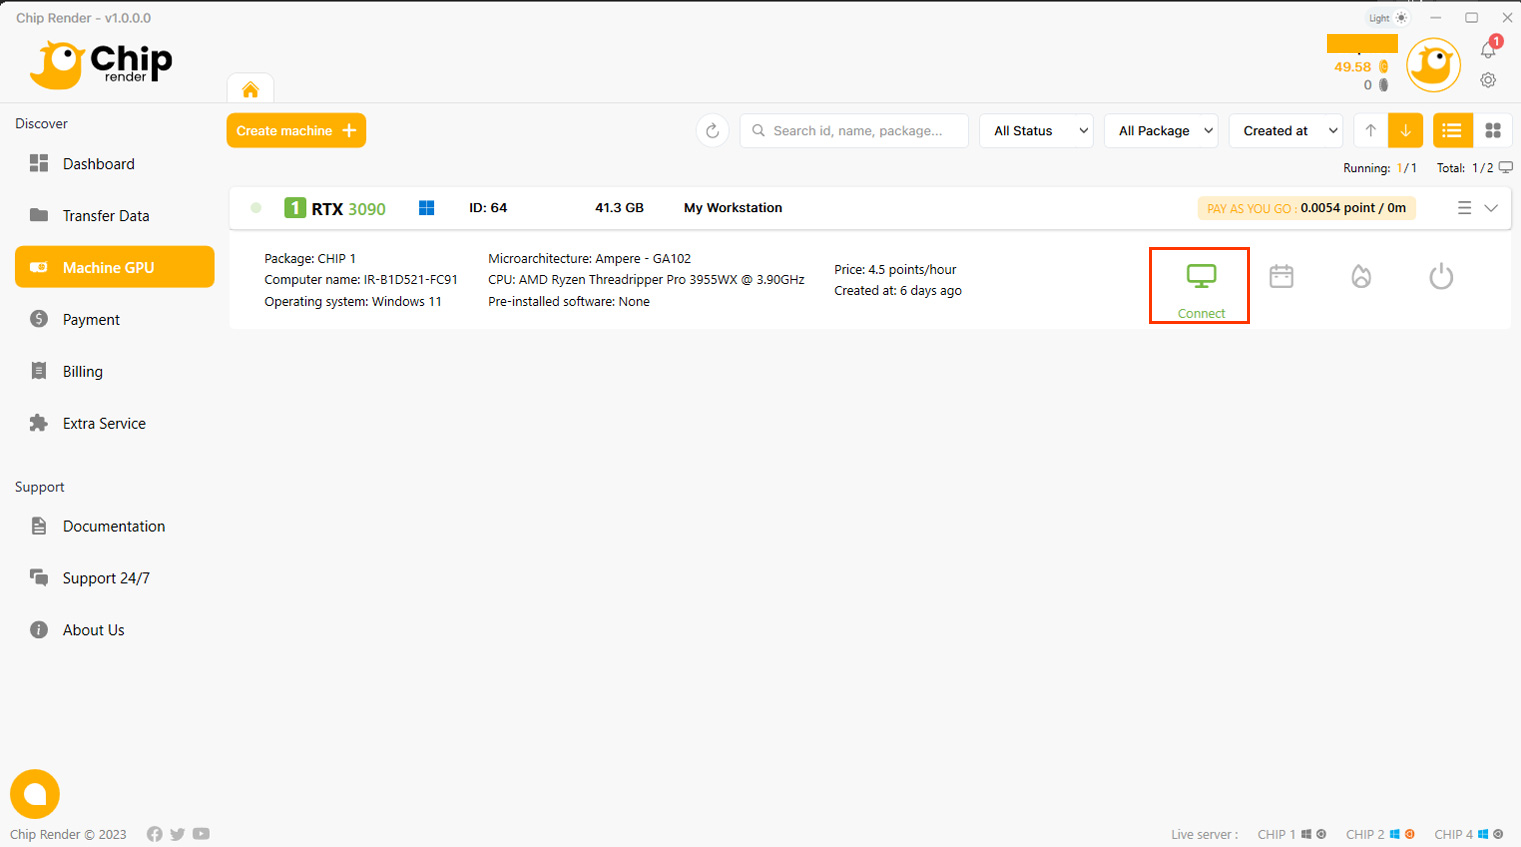
6. Connect to the remote machine
After your machine is booted successfully, your user interface will appear with a CONNECT icon (our system starts charging you from this step).
You should click CONNECT to connect to our remote server immediately.
This is the screen display after you click the Connect icon, the most potent gateway will always appear as default.
A tip for you to automatically connect to the best gateway by go to the setting icon beside your avatar and check to check box “Automatically connect to the best remote desktop gateway.”
Here you are! You’re on our remote server! You will take complete control of it, using it is the same as using your PC. As we suggest, you can install any software you want on this remote server and install it ONLY ONCE. Your working environment will be saved after each session of use. Therefore, you won’t have to re-install anything the next time you use it.
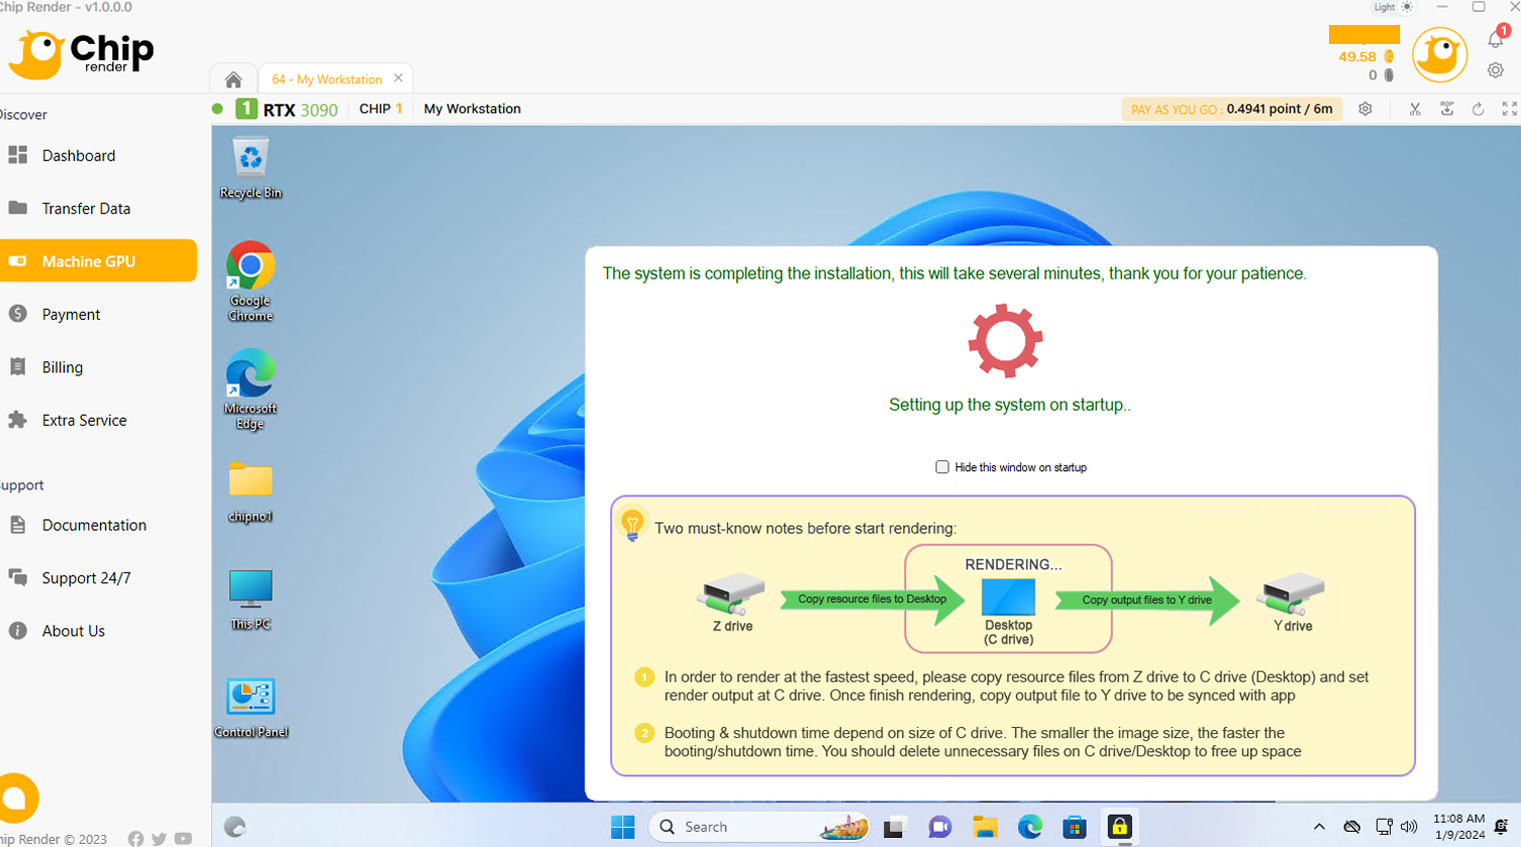
Now, set up your working environment (installing software and transferring your personal licenses) and start rendering.
All the uploaded files to our Chip Render App app will be on the (Z:) drive. However, Z is just a network/virtual drive for transferring files. Working directly on this drive can cause problems. Therefore, you will have to copy all of the files to the hard drive (Desktop/C:), then do everything (installing software, opening project files, saving output, and rendering) for stable rendering and avoiding network-related issues.
7. Shutdown the machine
After rendering on the server, move your result files from C: drive/Desktop to the OUTPUT (Y:) drive. These files will be synced to the Y drive in Transfer Data tab.
In this step, Chip Render allows you 2 options for you to shut down the remote server: normal shutdown and scheduled shutdown.
- Normal shutdown: You press the red Shutdown button on the machine to stop our system from charging.
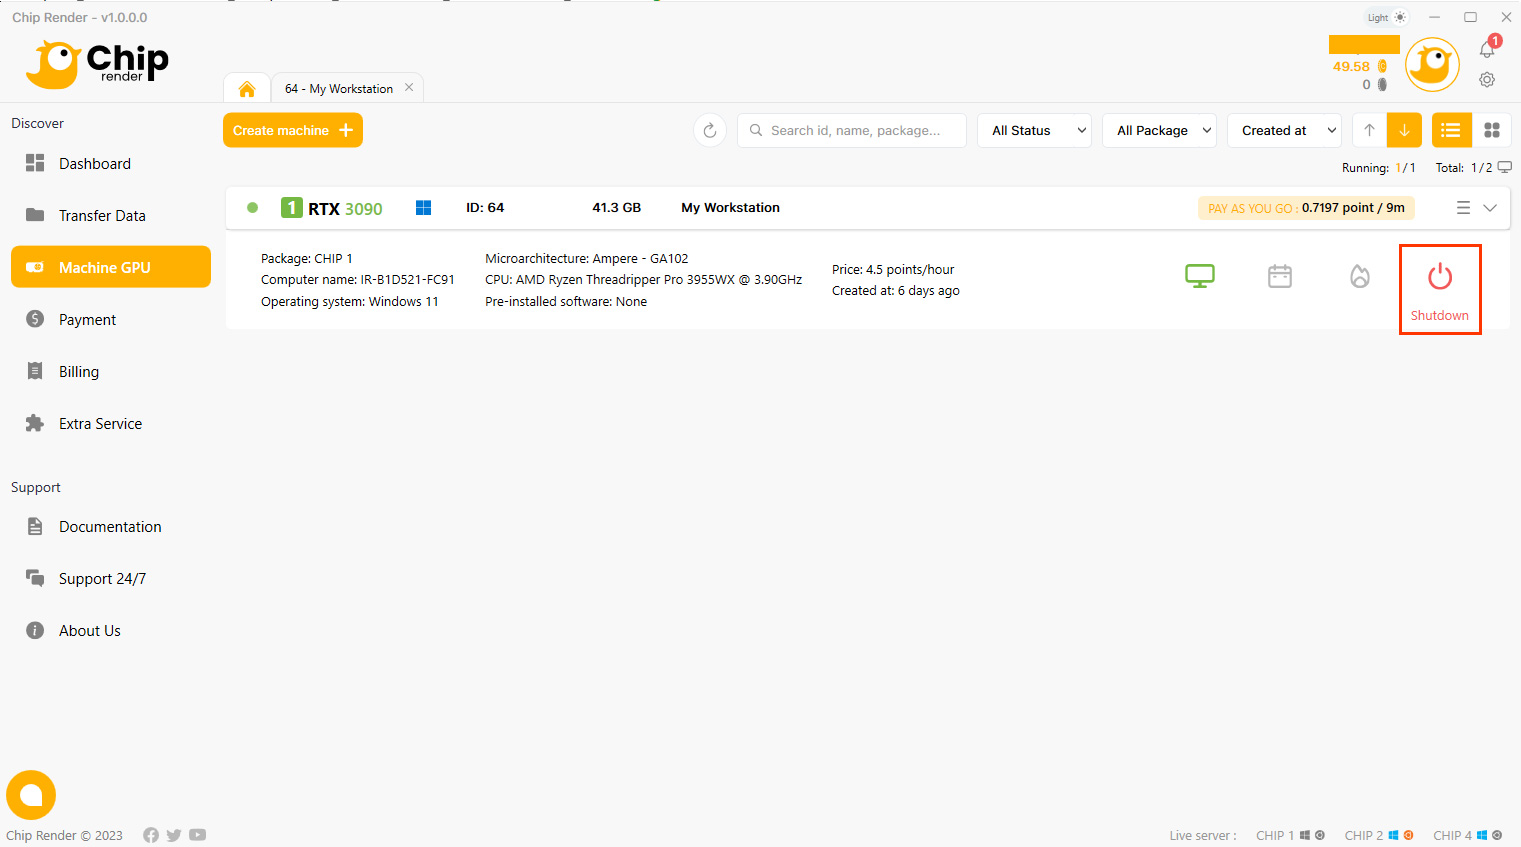
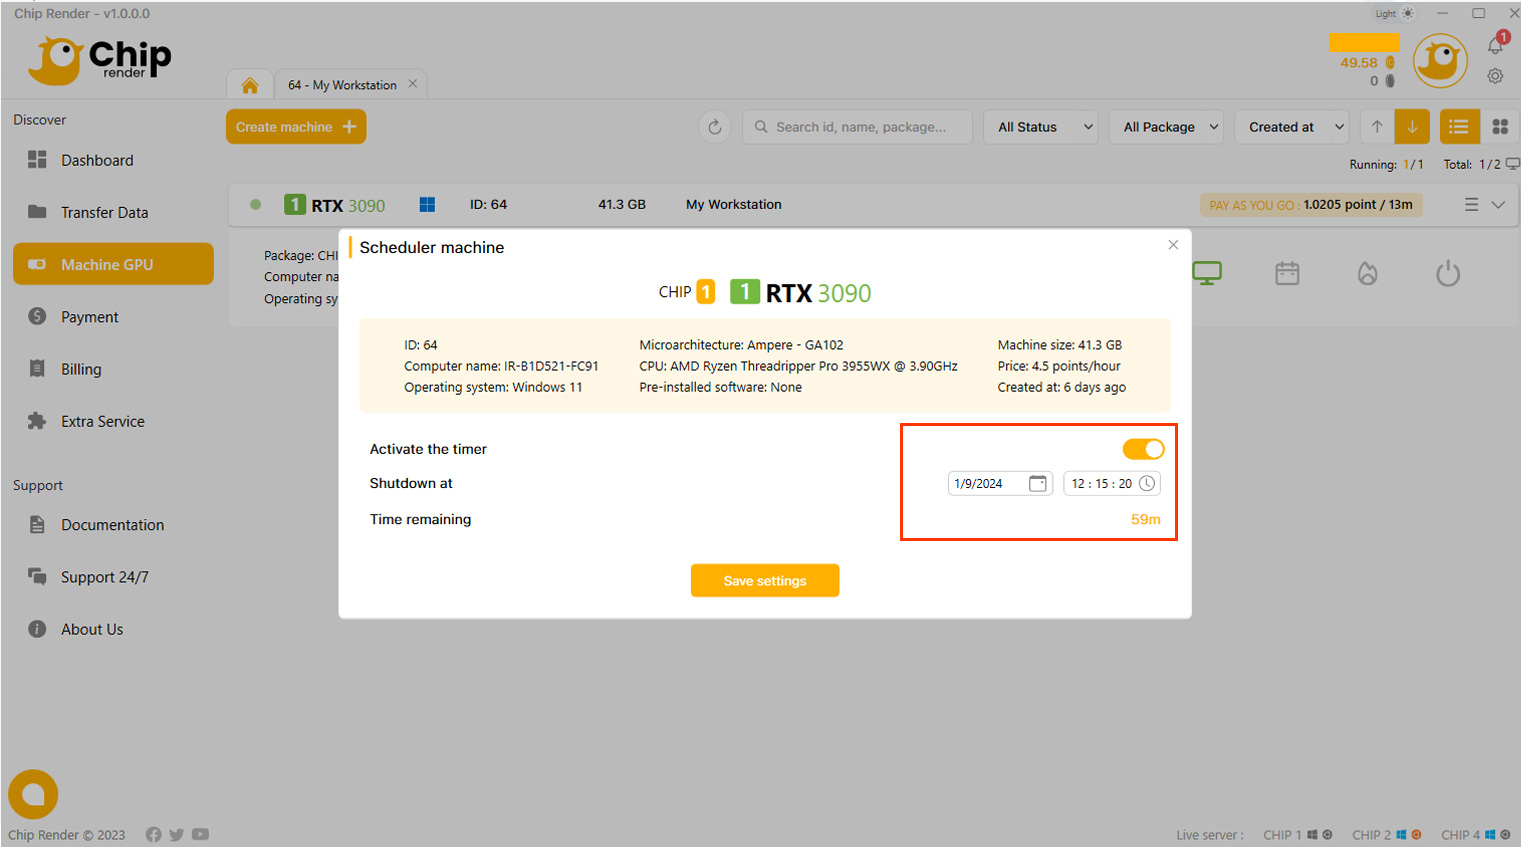
- Schedule shutdown: If you want to shut down your remote server at a specific time, click the “Scheduler” to schedule the shutdown time. Read more here.

8. Get the render result
Download the result files from the OUTPUT (Y:) drive in Transfer Data tab.
If you have any questions, please don’t hesitate to contact our 24/7 Support HERE

"We bring you the power of rendering, so you can get more time to enjoy your creativity!"